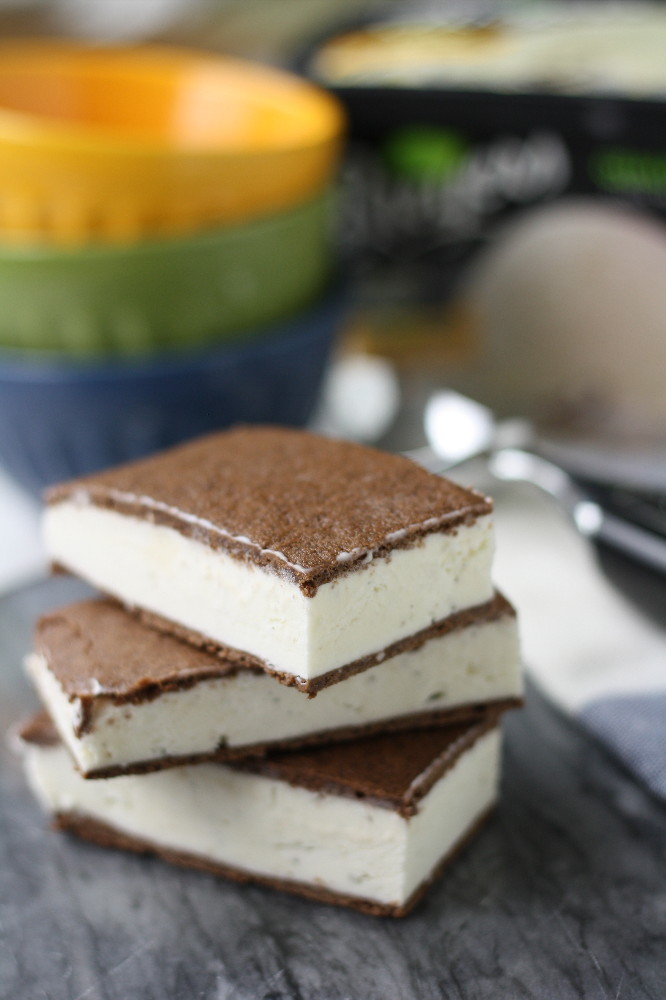
Labor Day Weekend, the unofficial end of summer (sigh) is looming. So is September 21, the fall equinox and official end of “those lazy-hazy-crazy days” (sang Nat King Cole). That doesn’t mean that you can’t keep summer going strong. And what better way than with a delicious, gluten-free ice cream sandwich?
If you’re like us, you have childhood memories of unwrapping the white paper, peeling it back, and taking a satisfying bite of vanilla ice cream sandwiched between a chocolate cake-cookie. They’re actually pretty easy to make. The trick to making a successful ice cream sandwich is for your unleavened cake-cookie to not turn into a brittle, rock-hard “crisp” once frozen.
Fortunately, we’ve figured that part out for you.
Ice Cream Sandwiches
Makes 10 sandwiches
Ingredients
1/2 cup (96g) sugar
1/4 cup (20g) unsweetened cocoa
1 stick (1/2 cup) melted butter
1 egg
1 tsp GF pure vanilla extract
1/2 cup (63g) Artisan Gluten-Free Flour Blend
1/2 tsp xanthan gum
1/4 tsp salt
*1 quart natural vanilla ice cream (homemade or store-bought)
Steps
1. Preheat your oven to 350 deg F.
2. In a bowl, mix together the sugar, cocoa, and melted butter.
3. Add the egg and vanilla, and mix until combined and smooth.
4. In a separate bowl, mix the flour, xanthan gum, and salt. Then add to the main bowl and mix to incorporate.
5. Line a cookie sheet with parchment paper.
6. Evenly spread the cake batter (using an offset spatula) into a rectangle about 10 x 15 inches.
7. Pull your ice cream out of freezer to allow it to partially soften. Meanwhile, bake the cake for 10 minutes, until it is set and dry to the touch.
8. Immediately place on a wire rack and let cool completely.
9. Cut the cake in half (so that you have two equal pieces, each 10 x 7.5 inches).
10. Place one piece, top down, onto large piece of plastic wrap. Be careful not to break the sheet.
11. Spoon ice cream onto the cake and make it even, but work quickly. Don’t let the ice cream get too soft or melt.
12. Place the other cake half on top. Firmly wrap with plastic wrap to hold it all together.
13. Slide the mega-ice cream sandwich onto a pan. Place it in the freezer until set, at least 3 hours.
14. Remove from the freezer, cut off any uneven edges, then cut into 10 equally-sized rectangles to make your ice cream sandwiches.
15. Wrap the sandwiches individually, or store them together in an airtight container in the freezer.
Degrees of Free-dom
This recipe is: gluten-free, peanut-free, tree-nut-free, fish-free, shellfish-free, soy-free, vegetarian.
To make this recipe dairy/lactose/casein-free, use your favorite DF ice cream and preferred DF butter substitute.
Notes
You can alter the thickness of the cake and the ratio of cake to ice cream to suit your own preferences.
Enjoy!
–Pete


Pete, you’re a GF rock star! Thanks for this recipe.
A question about the Xanthan gum in this recipe: Your recipe calls for xanthan gum, and you also have xanthan gum in the flour mix. How much xanthan gum would you recommend if I am using a flour mix that does not already contain it?
Thank you.
For this recipe, the 1/2 teaspoon additional xanthan gum should be enough even if your flour blend does not contain any. Because there is only 1/2 cup of flour in the recipe the amount of xanthan gum from the flour blend is very small.
Enjoy!
Kelli
We made these last week. They are amazing. Ice Cream sandwiches are something that my little girl really missed. We also made your slow cooker green chili with pork. It was delicious and we had left overs on nachos today.
Excellent recipe! I made this from my son’s class to rave reviews. I used a circle cookie cutter immediately after taking them from the oven. Worked great. I would recommend going a little thicker with the dough. I made 20 2 3/4 inch diameter sandwiches from a doubled recipe. I ran out of granular sugar and substituted powdered with no problem.
No one knew these were gluten-free. They were better than store bought according to 16 second graders. I have had requests for this recipe. Thanks so much.