With my millet malted, it was time to brew some gluten-free beer. The question was: what kind of beer to brew? Actually, before I answer that question, I’d already made an earlier brewing commitment…to do an all-grain beer.
Beer brewing at home basically can be done in three ways: extract (in which you use a dry powder or a syrup where the starches have already been converted to fermentable sugars for the yeast to act upon), a partial mash (basically an extract brew, with grain “adjuncts” added for flavor, body and character), and all-grain (in which you use 100% grain, some of which must be malted, and you are dependent on the science of the process and the enzymes to convert starches into fermentable sugars).
Being the from-scratch purist that I am, I opted to go the all-grain route, which is why I was malting millet in the first place. (Otherwise, I could have greatly simplified the process and bought some sorghum syrup and skipped many of the steps I’m about it describe.)
But back to the question of what kind of beer to brew. Of course, the simplest answer is “tasty.” That goes without saying! But it also helps to have a particular style in mind, and I chose to attempt a Belgian Wit. Wits are typically yeasty and cloudy, with hops plus strong hints of orange peel and coriander. I thought the style would pair well with gluten-free grains.
Ultimately, my recipe included several pounds of pale millet malt, a pound or so of medium roasted malted millet, another pound of medium roasted unmalted millet, and some medium roasted chestnut chips. I also used Czech Saaz hops, some bitter orange peel, and some coriander.
Before Brew Day could happen, I still had a little prep to do (for example, making a few pieces of brewing equipment…). I also had to prep the grain. Since I don’t yet own a grain mill, I crushed the grain using the Barbarian Method – transfering the grain to a plastic zip top bag in batches, I used a rolling pin and a meat mallet to do the crush. (Note: this method is inferior, and I plan on investing in a grain mill before my next all-grain batch of beer!)
Finally, it was time to brew. An oversimplified description of my day goes like this:
1. Steep the unmalted millet and chestnuts in water to begin to extract the starches, then bring to a boil to gelatinize those starches (this makes it easier for the enzymes to act on them).
2. Allow the boil to cool to strike temperature, then add the malted millet, confirm proper temperature, remove from heat, cover in blankets, and let sit for a specified period of time. This is known as the mash. During this time, the enzymes created during the malting process do their work, gobbling away at the starches and proteins, turning them into amino acids and fermentable sugars.
3. Remove the grain from the wort (the sweet liquid that will ferment to become beer) and sparge (drain additional water through the spent grain to extract every last bit of goodness). Add the sparge water to the brew kettle.
4. Bring the wort to a boil and add bittering hops.
5. Late in the boil, add the orange peel, coriander, and aromatic hops.
6. Rapidly chill the wort from boiling to about 70 degrees Fahrenheit.
7. Transfer to a carboy (the primary fermentation vessel), pitch the yeast, attach an air lock, and then sit back and have a drink. You’ve earned it.
At that point, I allowed the beer to ferment for about one week. During this time, fermentation accelerates rapidly, remains strong for a period of time, and then tapers off until there’s no visible activity. Also during this time, spent yeast as well as proteins and suspended solids settle out to the bottom of the fermenter. At the end of the week, I bottled the beer. From that point, it was another three weeks of patiently waiting while the beer carbonated and bottle conditioned. Then, at long last, more than a month before I first started malting millet, it was time to taste the fruits (err…fermented grains…) of my labor. (But that’s for tomorrow’s Friday Foto post.)
What follows below is a photo montage of the brewing process. A couple of notes: these are photos we took casually for our own amusement. We weren’t thinking ahead about using them on the NGNP blog, so they’re quite informal. Also, we didn’t photo-document every stage of the brewing process, but at least you can see some of the steps.

A trip to the hardware store for some raw materials, plus a blow torch and some solder, and I had my own home-made immersion wort chiller. The copper coils are submerged in the boiling hot wort, and cold water is circulated through the chiller, rapidly cooling the wort. I was able to make my own for about half the cost of buying one from a brewing supply store.

When you’re boiling upwards of 7 gallons of liquid, you need a pretty powerful burner that can really crank out the BTUs. I opted to go with a propane turkey fryer burner. As a double bonus, it came with a 7 gallon frying pot, which I repurposed as my brew kettle. Bonus! Here, Marin is helping me assemble the burner.

Sanitation, sanitation, sanitation. It’s the mantra of the homebrewer. Pretty much everything that touches your would-be beer must be sanitized, including the carboy. Here, Marin is helping me measure gallons so I could make graduated markings on the side of the container.
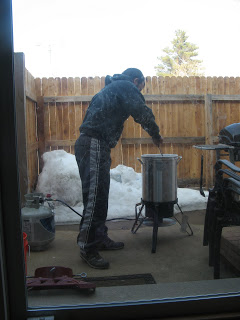
Stirring the mash. Some brewers call adding the grain to the water “doughing in.” It was easy to see why. Imagine adding crushed grain to water. It makes a kind of dough, so it’s nice to have a large ladle or paddle so that you can mix it up.

Later that night, at the end of a long brew day, I “stole” a small quantity of the wort in order to take gravity measurements with my hydrometer. The difference between the starting and final gravities (before and after fermentation) allow you to calculate the percent alcohol content of your beer.
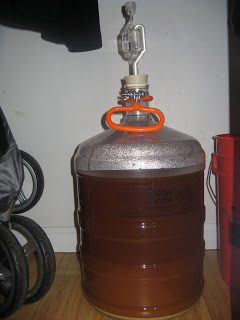
Roughly 5 gallons of beer, fermenting in a dark closet at approx. 70 degrees Fahrenheit. If you look carefully, you can see a light tan-colored ring around the bottom. That is the traub…the settled proteins plus spent yeast.
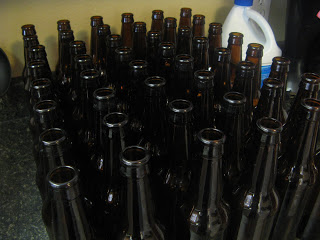
Bottling day. 48 bottles cleaned and sanitized and ready to receive their beer.
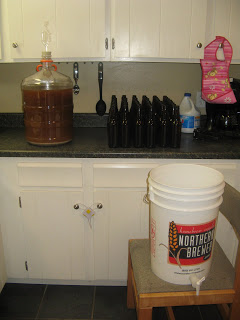
The bottling setup. First, the beer is siphoned from the carboy to the bottling bucket. Then, the beer is siphoned from the bottling bucket to the bottles.

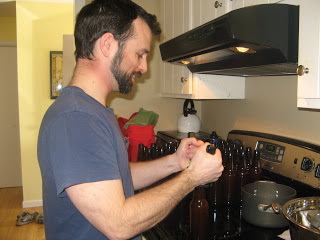
Bottling the beer. (Yes, I was so excited to bottle that I literally rolled out of bed, wearing shorts, a t-shirt, and man slippers, and got right to it.)

There it is! A certified bottle of Zonder Gluten Belgian Wit. (I named it Zonder Gluten as a nod to my Flemish-speaking family in northern Belgium. “Zonder” means “without” in Flemish, and so Zonder Gluten Belgian Wit translates as “Gluten-Free Belgian Wit.”)
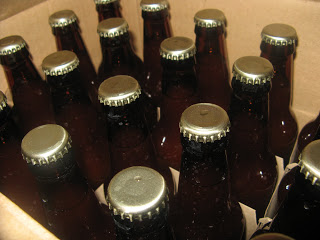
Lastly, the bottles went into a cardboard box and were relegated to a back corner of a closet where they sat for 3 weeks, slowly carbonating and bottle conditioning.
Coming tomorrow: the outcome!
– Pete
We brewed gf beer and I too malted my own grain (I used amaranth) but we added it to sorghum syrup instead of doing the whole mash route.
I am interested to hear how yours tastes. The sorghum based beer is alright but has a certain something to it and I’d like to get away from that. I think Redbridge has that same something to it that I dislike and its go t to be the sorghum.
Hi BakingBarb… Glad to hear there are some other gluten-free home brewers malting their own grains out there! There’s quite a group of us over at homebrewtalk.com. Have you been?
Yeah, many people criticize sorghum for the apple and/or citrus flavors that it imparts to beer. It seems all the commercial GF beers use sorghum, which is one reason why I didn’t want to use it in my own brew…
Cheers, Pete
I can’t wait to find out how it tastes!
Hi Gaile… That info is coming tomorrow, but here’s a sneak preview: it’s good! =)
Cheers, Pete
Awesome peter!
Great recap of the process. I am very familiar with the process but at my house we make gluten filled beer. (I’ve never really cared for beer.)
We also have a propane turkey fryer – we are vegetarian, so that’s all it gets used for! And a similar wort chiller. I remember one time we went to home depot to get some supplies and we were standing in the plumbing aisle trying to figure out the fittings and an employee asked if he could help us. We weren’t quite sure what to tell him so we didn’t look like goofballs making this crazy contraption for beer.
I will be interested to see how it turns out. Now to start growing your own hops too! We do. But it is hard to grow enough for as much beer as you want to brew.
We are getting bees this year and hope to make mead for a second time. That’s more my style than the beer.
Peter,I hadn’t but I will be now. Thanks
Hi Renee… I’d love to start growing my own hops! I’ll just need a bigger plot to do it (we currently live in a townhome with an itty bitty backyard…).
Cheers, Pete
Dropping by to catch up with your latest posts per usual. 😉 You look incredibly happy in these photos! LOL I guess the prospect of some good home-brewed gf beer will do that to a guy. 🙂 Okay, on to see how it turned out …
Shirley
Hey Shirley… Yes, I was indeed happy! Brewing my own beer…what’s not to love? =)
Cheers, Pete
Pete,
Thanks for the info on brewing with millet. I have done several gluten free beers mostly using Sorghum and Brown Rice Syrup. Been contemplating trying some millet or other gluten free grains. Personally I have been pleased with what I have produce with the Sorghum, I use a lot higher AAU hops to cut some of the Sorghum taste. Anyway thanks for sharing this with us. Sounds good. I live in Colorado so have many avenues of supplies.
Thanks very much this gluten beer is very good