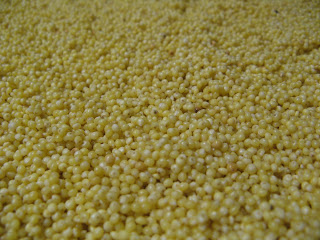
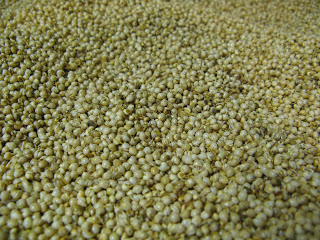
 De-hulled millet, as commonly sold in supermarkets (both pre-packaged and bulk bins)
Within gluten-free circles, saying the word “malt” is aking to saying a four letter word. Yes, it’s literally a four letter word (m-a-l-t). But it’s also a Four Letter Word, a taboo. That’s because, in the United States, “malt” is synonymous with barley, and as I’m sure you’re aware, barley is a no-no if you’re on a strict gluten-free diet. Both the FDA and TTB officially define malt as being made from barley, and culturally, there’s that assumption as well. The result is that foods such as malt vinegar, some cereals, and beer all contain gluten, because they’re made from malt, aka malted barley, aka barley malt extract. In this context, we’re talking about malt as a noun.
But there’s also malt, the verb. As in, to malt. In this context, it’s a process, and it can be applied to any grain, including gluten-free grains such as millet, corn, sorghum, buckwheat, and quinoa. At its most basic, the process is a simple one: you germinate the grain. Natural food aficionados will know this process by another name: sprouting. To do it, you basically soak your chosen grain in water for a specified period of time, then remove it from the water and maintain it under conditions that foster germination.
Why sprout? Generally speaking, sprouting produces a series of desirable changes in a grain. Most important are conversions that take place – namely, the production of enzymes, the conversion of proteins to amino acids, and the conversion of carbohydrates into simpler sugars. The benefits for the human eating sprouted grain are numerous. For example, sprouted grains are easier to digest (since the grain’s own enzymes are doing some of the work for you), tastier (they’re slightly sweeter), and they’re more nutritious (since the amino acids and sugars are more readily absorbed).
People use sprouted grains in all sorts of ways, such as baking special breads.
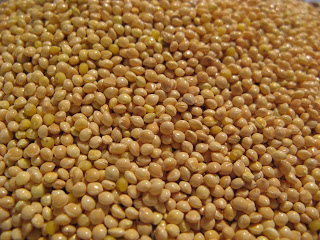 Millet with the hull, prior to soaking and germination
My interest in sprouted grains was motivated by another reason: brewing gluten-free beer. Malting, as specific to brewing, is more or less a very specific form of sprouting. Consider it a carefully controlled germination. That’s because in brewing, the temperature of germination, moisture content of the grain, and duration of germination all have important impacts on the development of desirable characteristics (such as the amount and balance of alpha and beta amylase enzymes). The idea is to create the right amount of enzymes in the right proportions in order to break down the complex carbs into simpler fermentable sugars (which the brewing yeast converts to alcohol and carbon dioxide) and in order to develop the proper amount of amino acids, including Free Amino Nitrogen (which is important in yeast nutrition).
One of the unique aspects of malting (and sprouting more generally), is that you need grain with the hull still on. Alas, it almost never is. Most supermarkets sell grains that have been de-hulled (see the top-most photo above). The thing is, grain without the hull almost never germinates. (In the case of millet, less than 10% might germinate…hardly a good ratio.)
For my own malting (with millet), I obtained my grain from a millet farmer in northeastern Colorado – a 50-pound bag of millet with the hulls still on. Next, I weighed out 6 pounds of millet, and gave it three 8-hour soaks in water, with an “air rest” in between each soak. The result was better than 90% germination rate.
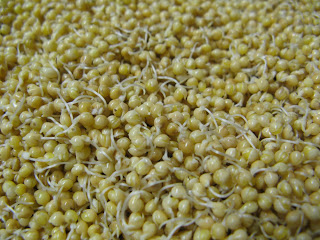 Just after initial germination
Once germination began, I was amazed how rapidly it progressed. First, the rootlets appeared. They grew longer and longer, seemingly before my very eyes. Next, the shoots began to emerge.
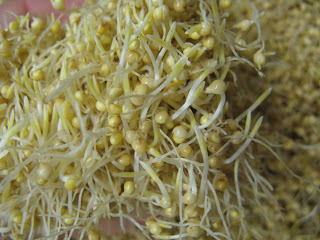 After 60 hours (~2.5 days)
Soon, the kitchen began to smell like a greenhouse (or at least, like wet vegetation). After about 2.5 days, germination had progressed far enough that the enzymes would be well-developed, and it was time to halt the process. This is in order to avoid “malting loss.” The longer your grain germinates, the more the growing plant feeds on the carbs and protein. And the longer the plant feeds, the less you have for the brewing yeast to turn your hard-earned malt into beer.
 After kilning, with most roots and shoots removed, mildly roasted
In order to stop germination, I kilned the millet in our oven for several hours over fairly low temperatures. This dries out the grain and dessicates the roots and shoots, halting the process. Finally, I separated the roots and shoots from the grain, retaining only the millet. A short roast in the oven, and I was ready to begin brewing with my home-malted millet. But this, of course, was the good kind of malt…gluten-free malt, just the thing I needed to make some gluten-free beer.
– Pete
Love to learn new processes, this is fascinating!
Will you be willing to share the rest of the GF beer creation?
And just since you seem to have studied this a lot, how do they make the malt into a syrup? I would love to create a chocolate malt cake from a dear recipe of the past but haven’t been able to find the malt syrup Gluten free.
Thanks
Hi Jean… Absolutely! I’ll be sharing the full journey in a series of posts about gluten-free brewing continuing tomorrow (Thursday).
To make a gluten-free malt syrup would be quite involved. Once you have the malted grain (such as millet), you’d need to crush the grain, do a mash, and then boil the wort down to evaporate the water off until you have a sweet syrup of appropriate consistency. (This process will become clearer as I do my posts about brewing…)
Cheers, Pete
Thanks, this is great. I”m going to show my husband.
How does it work, logistically, for the air rest period between each soak? Do you spread all this grain around on a beach towel and leave it on your table, for instance? Leave it all in a bowl? Does it have to be fairly thinly spread so all the grain gets air?
How much space does 6 lbs of millet take up? I’m picturing a 5 lb bag of flour and then imagining that un-ground grain would take up a somewhat larger space.
Is this for one batch of beer or is it enough for several?
Awhile back, before my husband was GF, he tried an Ancient Egyptian Beer recipe that called for, basically, soaking wheat kernels in water and then leaving them in a dark crock, loosely covered, for several months.
EEEEW! the results were pretty nasty. I don’t think he even tasted it. But the space under our kitchen sink smelled somewhat, shall I say, fertile. As in well fertilized. Um, organic, perhaps.
Oh, and please, don’t anyone malt sorghum. Conventional wisdom dictates that some sort of toxins are readily produced when sorghum is malted; it should therefore always be attempted under laboratory conditions.
Hi theMom… For the air rest, yes, you should spread the grain into a fairly thin layer, so that all grain has exposure to the air. Otherwise, the grain risks suffocating.
6 lbs of millet takes up a lot of space. That’s more or less my full capacity with my current setup (using a custom-made malting tray, our kitchen oven, etc.). Any more than that and I”m going to have to upgrade!
I did an all-grain 5 gallon batch, and also used some unmalted roasted millet and roasted chestnuts, totaling about 7.5 pounds of grain. However, if you’re doing extract brewing and using only small quantities of grain as an adjunct, then 6 lbs of millet will go much further.
The toxins you describe in malted sorghum are primarily cyanide. They only develop in the roots and shoots, not in the grain. If you’re very careful to remove all new growth, and retain only the grain, you can safely malt sorghum at home. But for most homebrewers, the effort far exceeds the payoff, so they stay away from malting sorghum.
Cheers, Pete
Just got your cookbook from the library. I can’t wait to have time to peruse it. Although, I think my husband would use it more. I’m kind of a quick, economical and healthful kind of cook. My husband is the artisan. He cooks for pleasure; I do it to feed the troops and keep the budget balanced.
I know we’ll have fun looking through it and it will probably go on a Christmas wish list.
Hi theMom… Sounds good!
Cheers, Pete
Totally news to me, so thanks for sharing, Pete! You really earned those beers! LOL But, if you are having fun and learning, that’s awesome. And, I love not having to rely on others for my favorite foods and products, plus making them my own way (as you have done). Looking forward to more posts on the topic. I’m thinking you’ll be inspiring lots of folks to make gf beer! 🙂
Shirley
Hey Shirley… The malting was quite a process to learn (especially if you want to carefully control factors such as germination temperature…). But it was definitely worth it – as you know, I love making foods from scratch…and I guess that now includes beer. Plus, it’s much cheaper to brew beer this way! =)
Cheers, Pete